
Learn how to make the iconic Japanese rolled omelette with my step-by-step tutorial and video. My 3-Ingredient Simple Tamagoyaki recipe requires no dashi and is ready in just 15 minutes! Enjoy this savory-sweet dish in your breakfast or bento lunch.
I’ve shared a few methods for making tamagoyaki, the Japanese rolled omelette that serves as a powerful protein side dish for breakfast and bento lunches. Both my original recipe and this one, inspired by Midnight Diner, involve a bit more skill and require the use of dashi (Japanese soup stock) in the ingredients.
To encourage everyone to make tamagoyaki more often, I’ve developed a technique without the use of dashi. Here, we have a simple, 3-Ingredient Tamagoyaki recipe that you can rely on! I hope it becomes a staple in your menu.
Note: Before you jump straight to my recipe card, I encourage you to carefully read through the tips and techniques. It is a little lengthy, but the information will equip you with the know-how to give you a good head start in making the perfect tamagoyaki.
What is Tamagoyaki?
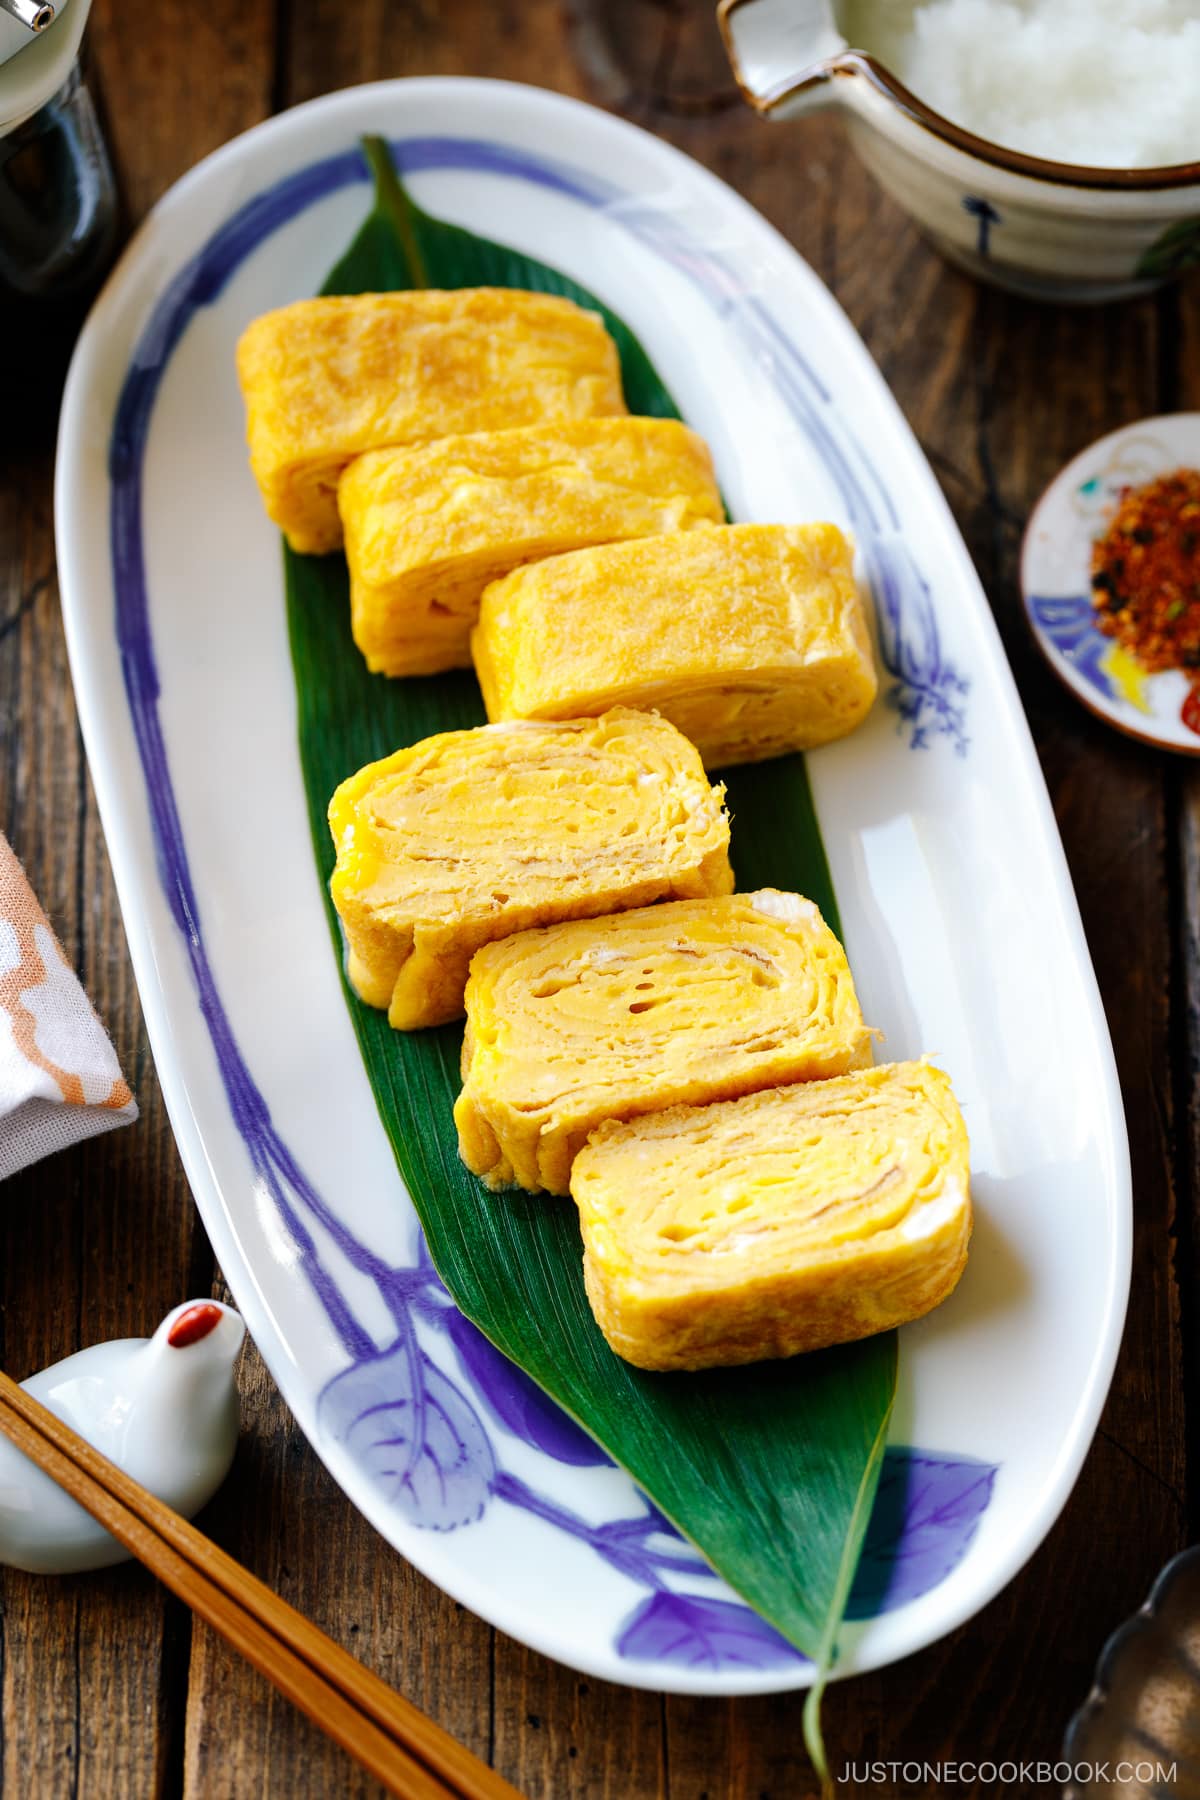
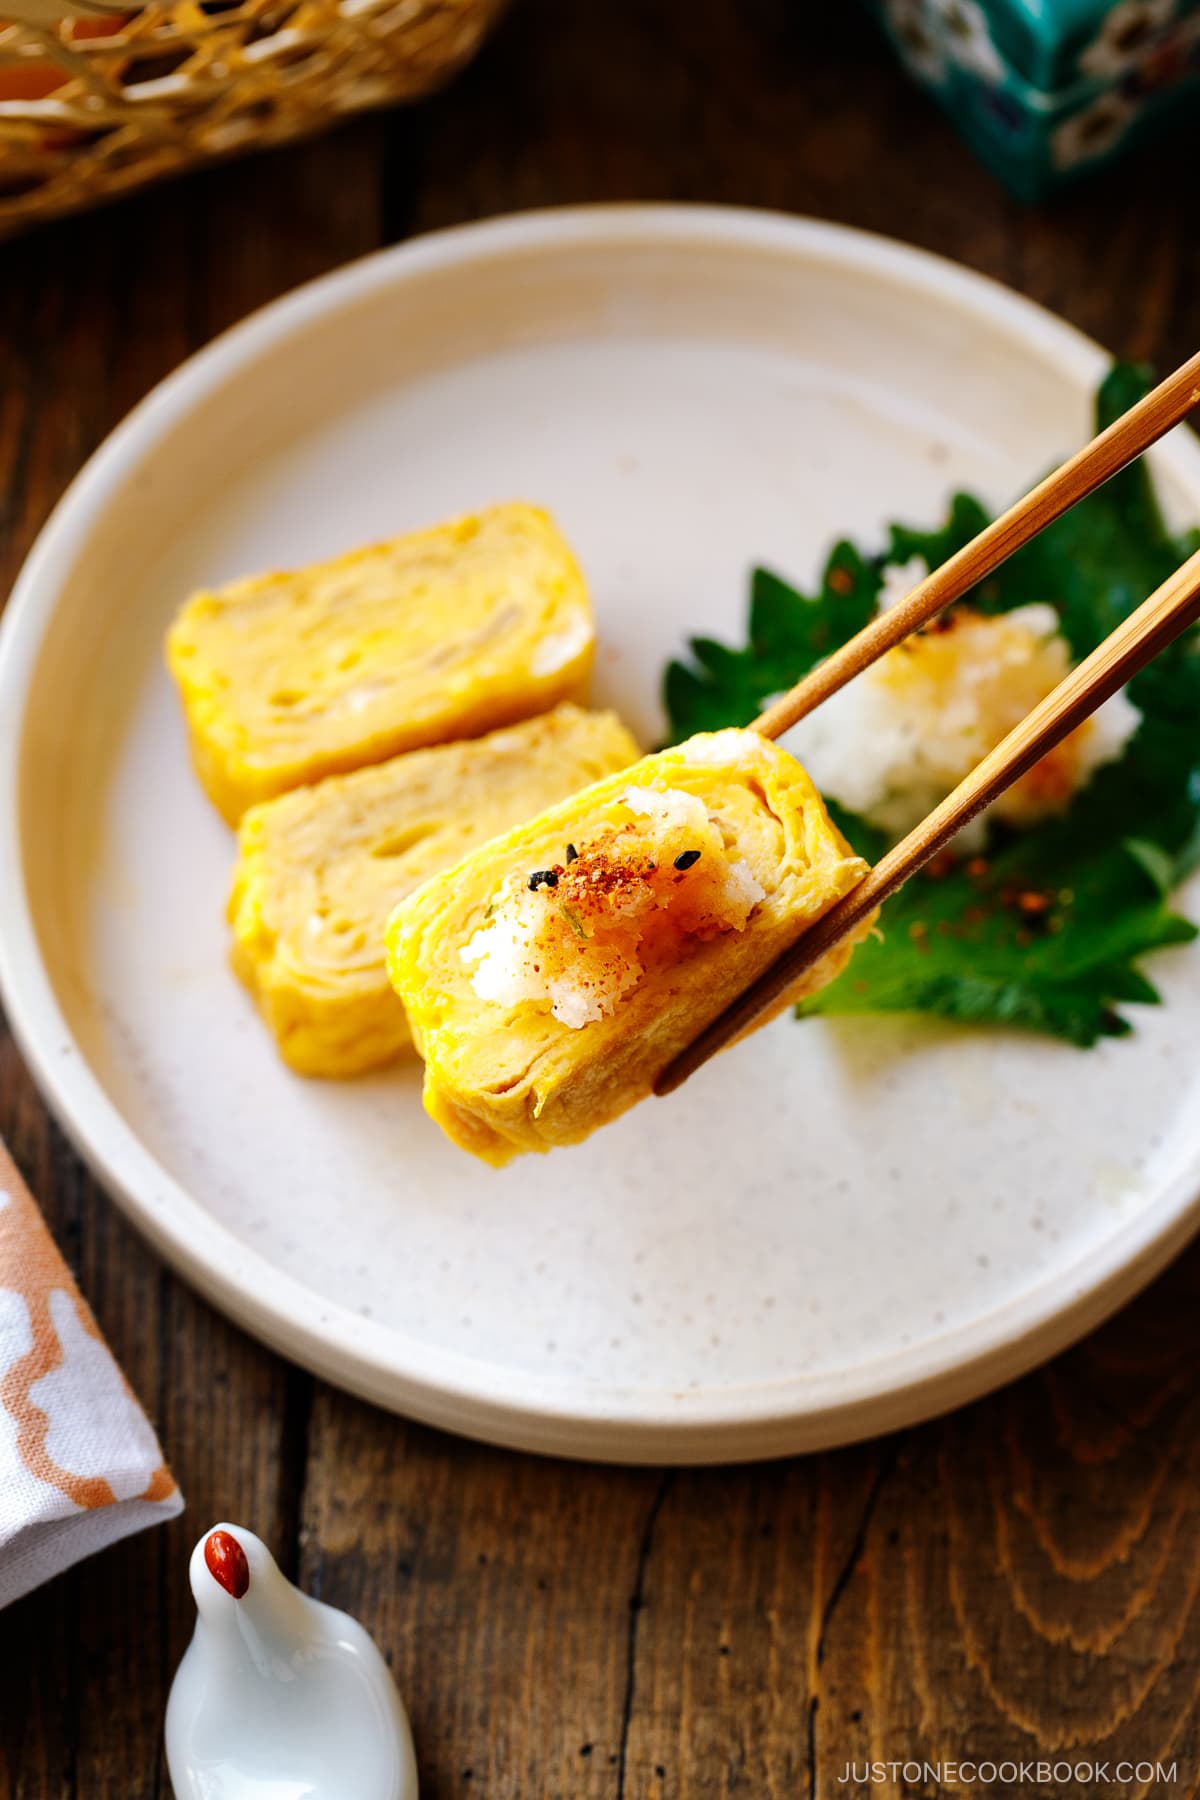
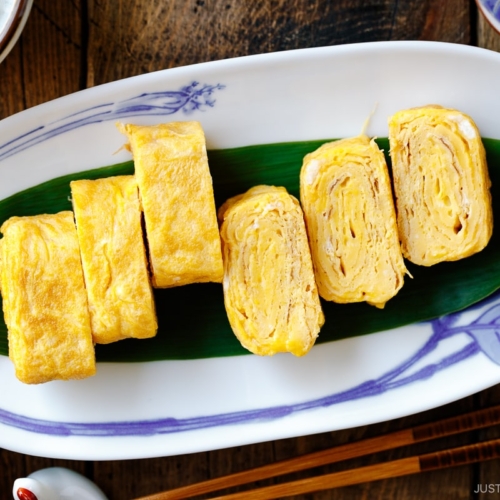
Tamagoyaki, the Japanese rolled omelette, is known for its bright yellow, miniature pillow-shaped appearance. This petite egg dish is ubiquitous in Japan and is a favored option for breakfast or as a filling for bento boxes.
The preparation involves rolling thin layers of seasoned and slightly sweetened egg mixture to create a compact, rectangular shape.
Variations of Tamagoyaki
Tamagoyaki (玉子焼き, 卵焼き) is a general umbrella term for various types of Japanese rolled omelettes. It can be dashimaki or atsuyaki depending on the region. My “tamagoyaki” recipe below is the simplest form of a rolled omelette without extra sugar or dashi (Japanese soup stock).
- Dashimaki Tamago (出汁巻き玉子) – Primarily enjoyed in the Kansai (Osaka) region, this rolled omelette features a dashi-forward, salty flavor due to the large amount of dashi used in the egg mixture. Among all the types of tamagoyaki, this is the most challenging to make as the egg mixture is very watery. As a result, dashimaki is very silky and tender and must be eaten immediately.
- Atsuyaki Tamago (厚焼き玉子) – Known for its sweetness, it is enjoyed in the Kanto (Tokyo) and north of Kanto regions. With less dashi in the egg mixture, it’s much easier to make, but the sugar content makes it prone to burning. I prepare a golden sweet dashi called Kanro Dashi (甘露だし) ahead of time, making it easier to frequently enjoy atsuyaki tamago.
- Castella Tamago (カステラ玉子) – Served as part of the Edomae-style sushi menu at high-end sushi restaurants in the Kanto (Tokyo) region, this variation is reminiscent of a sweet baked dessert, Castella. The method of making Castella Tamago is similar to Datemaki. The spongy, bouncy texture comes from the addition of shrimp paste and grated yam to the egg mixture. Unlike being rolled in a pan, it is baked in the oven.
Ingredients for Tamagoyaki
You’ll need only just 3 ingredients to make this tamagoyaki:
- Eggs – I use American large eggs. Each weighs 50 grams without the shell.
- Sugar – I use organic cane sugar from Costco
- Soy sauce – Use usukuchi soy sauce or Japanese light-color soy sauce so your tamagoyaki doesn’t turn dark in color. If you don’t have it, use regular Japanese soy sauce. Please note that Japanese light-color soy sauce is different from Chinese light soy sauce.
- Kosher salt – Just a pinch to bring out flavors without adding more sugar or soy sauce.
- Water – This can be optional, but I believe it yields a fluffier omelette.
- Neutral cooking oil
How to Make Tamagoyaki
I won’t claim that making tamagoyaki is easy; in fact, it requires practice. I lose the hang of it when I don’t make tamagoyaki for a while. I was a bit out of practice in the video, as you may have noticed. This reminds me that I need to continue making tamagoyaki occasionally!
- Make the egg mixture by combining all the ingredients. The standard technique for mixing the egg mixture for tamagoyaki is to ‘cut’ the eggs with a zig-zag motion, using chopsticks attached to the bottom of the bowl. Avoid whipping or incorporating air into the mixture.
- Heat the (tamagoyaki) pan thoroughly. I usually start heating it on a very low heat while I prepare the egg mixture. Check if the pan is hot by touching it with chopsticks dipped in egg mixture. If it sizzles, the pan is ready.
- Grease the pan thoroughly with a pastry brush or paper towel.
- Pour a thin layer of the egg mixture into the pan, popping the air bubbles.
- Once the egg mixture is set, begin rolling from the far edge of the pan toward the edge closer to you.
- Repeat steps 3 and 5 until all the egg mixture is used. Read the recipe card below for detailed tips and techniques.
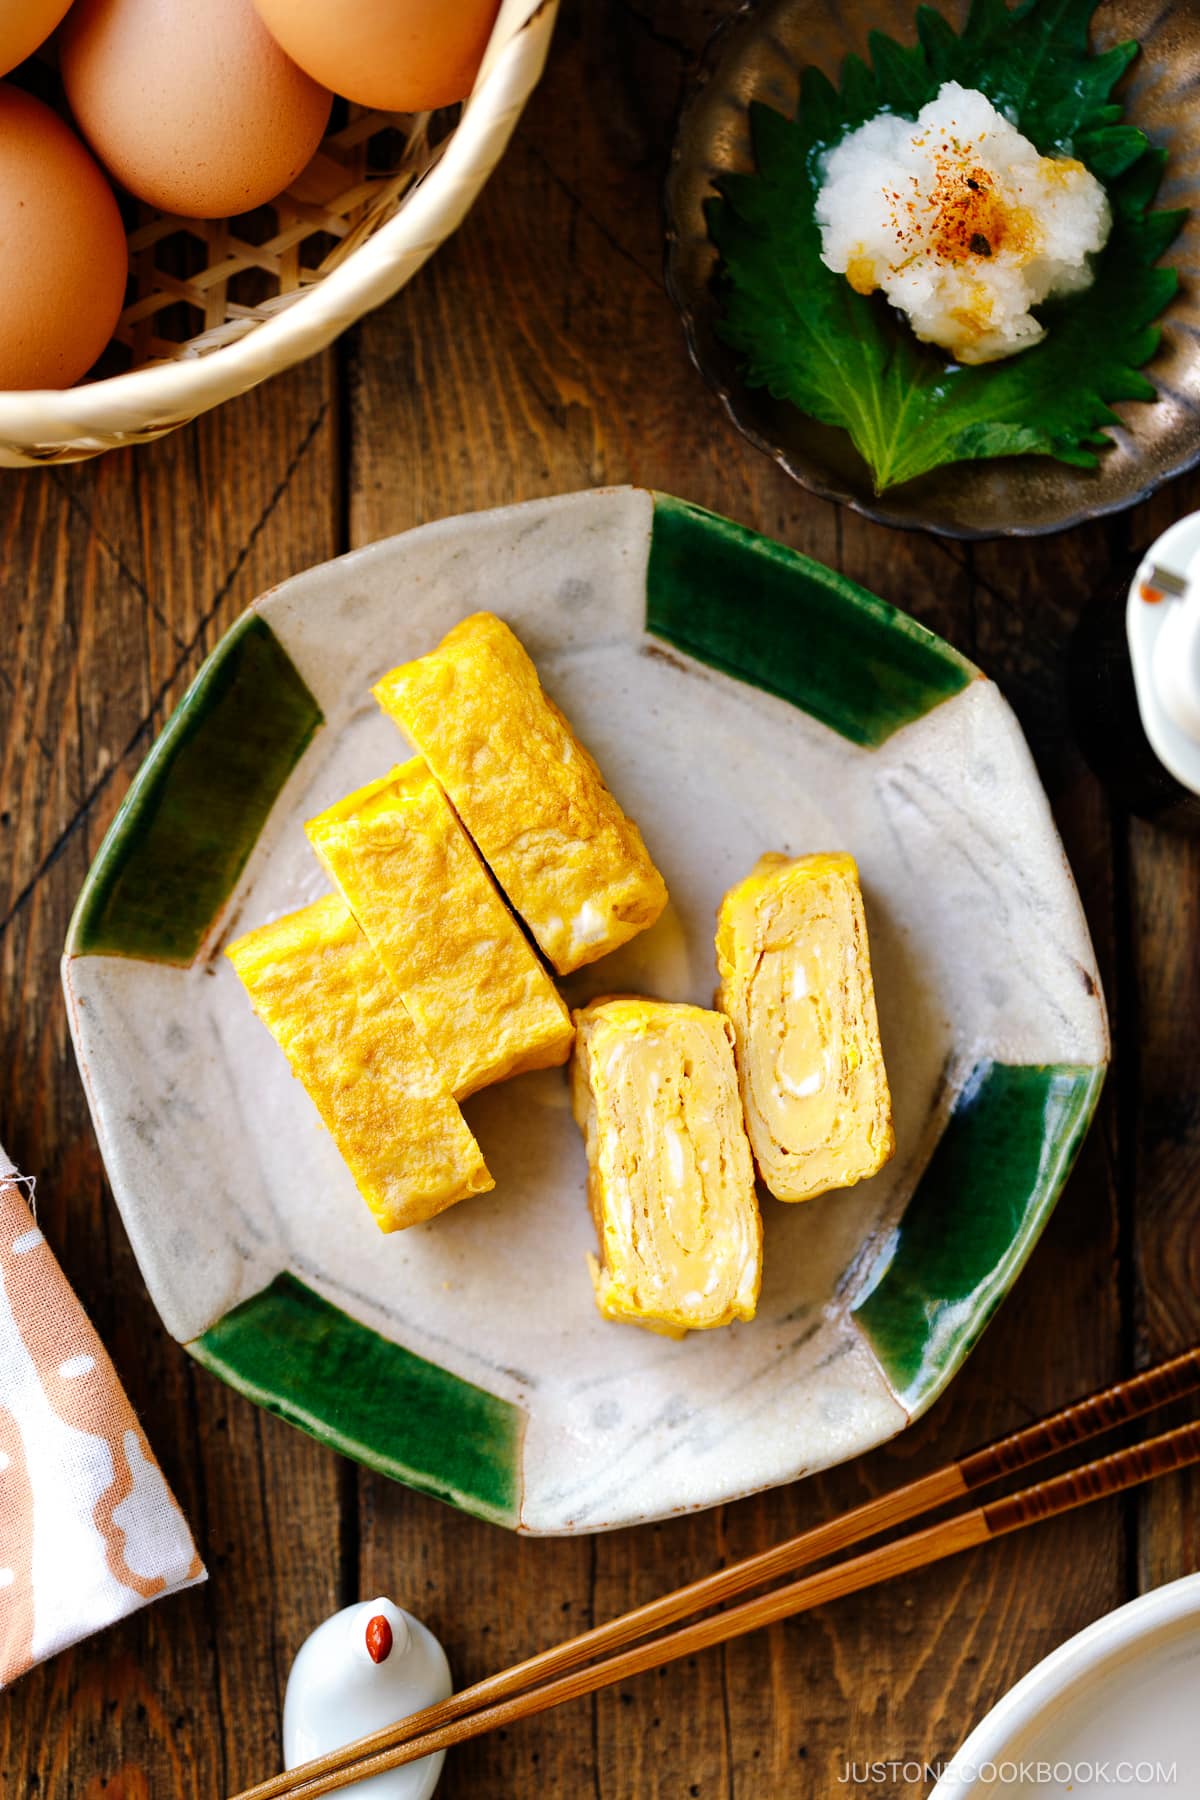
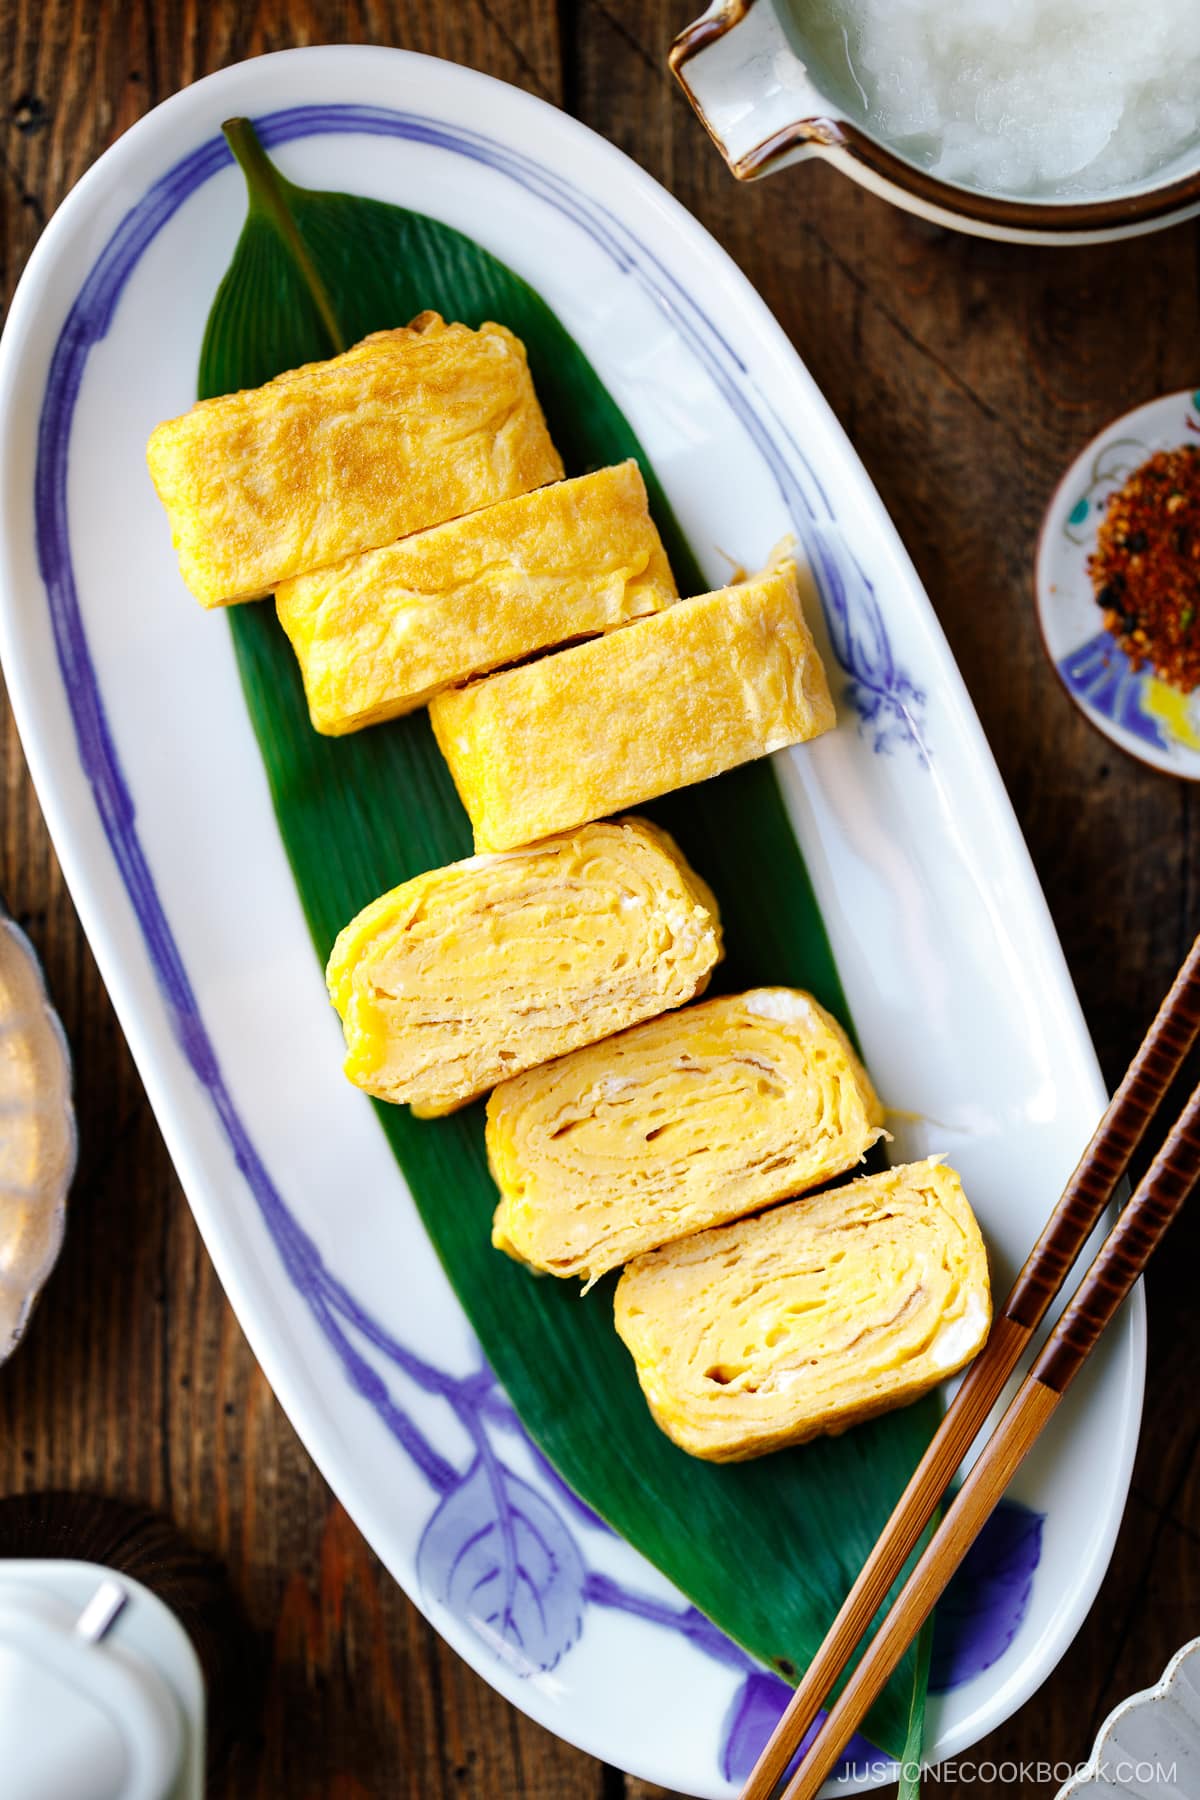
- Shape the omelette using the bamboo sushi mat (optional), cut into 6 equal pieces, and enjoy!
Cooking Tips and Techniques
For a successful result, please read and remember the following key points before cooking:
- Do not whip the eggs and avoid incorporating air into the mixture. The best approach is to “cut” the egg with chopsticks in a zig-zag motion while the chopsticks are touching the bottom of the mixing bowl. Optionally, for a refined texture and even coloring, you can use a fine-mesh sieve to pass the egg mixture twice.
- Heat the pan thoroughly. Wait until the pan is well-heated before pouring the egg mixture. Test the heat by the sizzling sound; you can use water or dip your chopsticks in the egg mixture and touch the pan.
- Grease the pan well each time before you pour the egg mixture. I understand you want to use less oil, and I do, too! However, if you skip and skimp, the egg mixture will stick. If using a non-stick pan, you may use less oil.
- Listen for the sizzling sound each time you add the egg mixture. This confirms that the pan is hot.
- Adjust heat depending on your skill Level: Beginners, use medium heat; as you become proficient, use medium-high or high heat for a finely textured tamagoyaki. Adjust heat by moving the pan closer or farther from the heat source.
- Tilt the pan to evenly distribute the egg mixture and start rolling as soon as it is set and not runny. Once a thin layer of the egg mixture is in the pan, cook the egg quickly before turning too brown or burnt. If one area has a pool of the runny egg mixture, tilt the pan and distribute it so that it will cook faster.
- Pop the air bubbles to avoid uneven layers and breakage while rolling. Once you break the air bubbles, fill it with a runny egg mixture.
- Do not worry about the initial rolls. The first few rolls form the center of the tamagoyaki, so even if the layers are not perfectly rolled up, do not worry!
- Lift the finished rolled log and pour the egg mixture under the tamagoyaki to bind the new layer and finished layered log.
- Shape the roll with a bamboo mat. This helps cook the egg with the remaining heat.
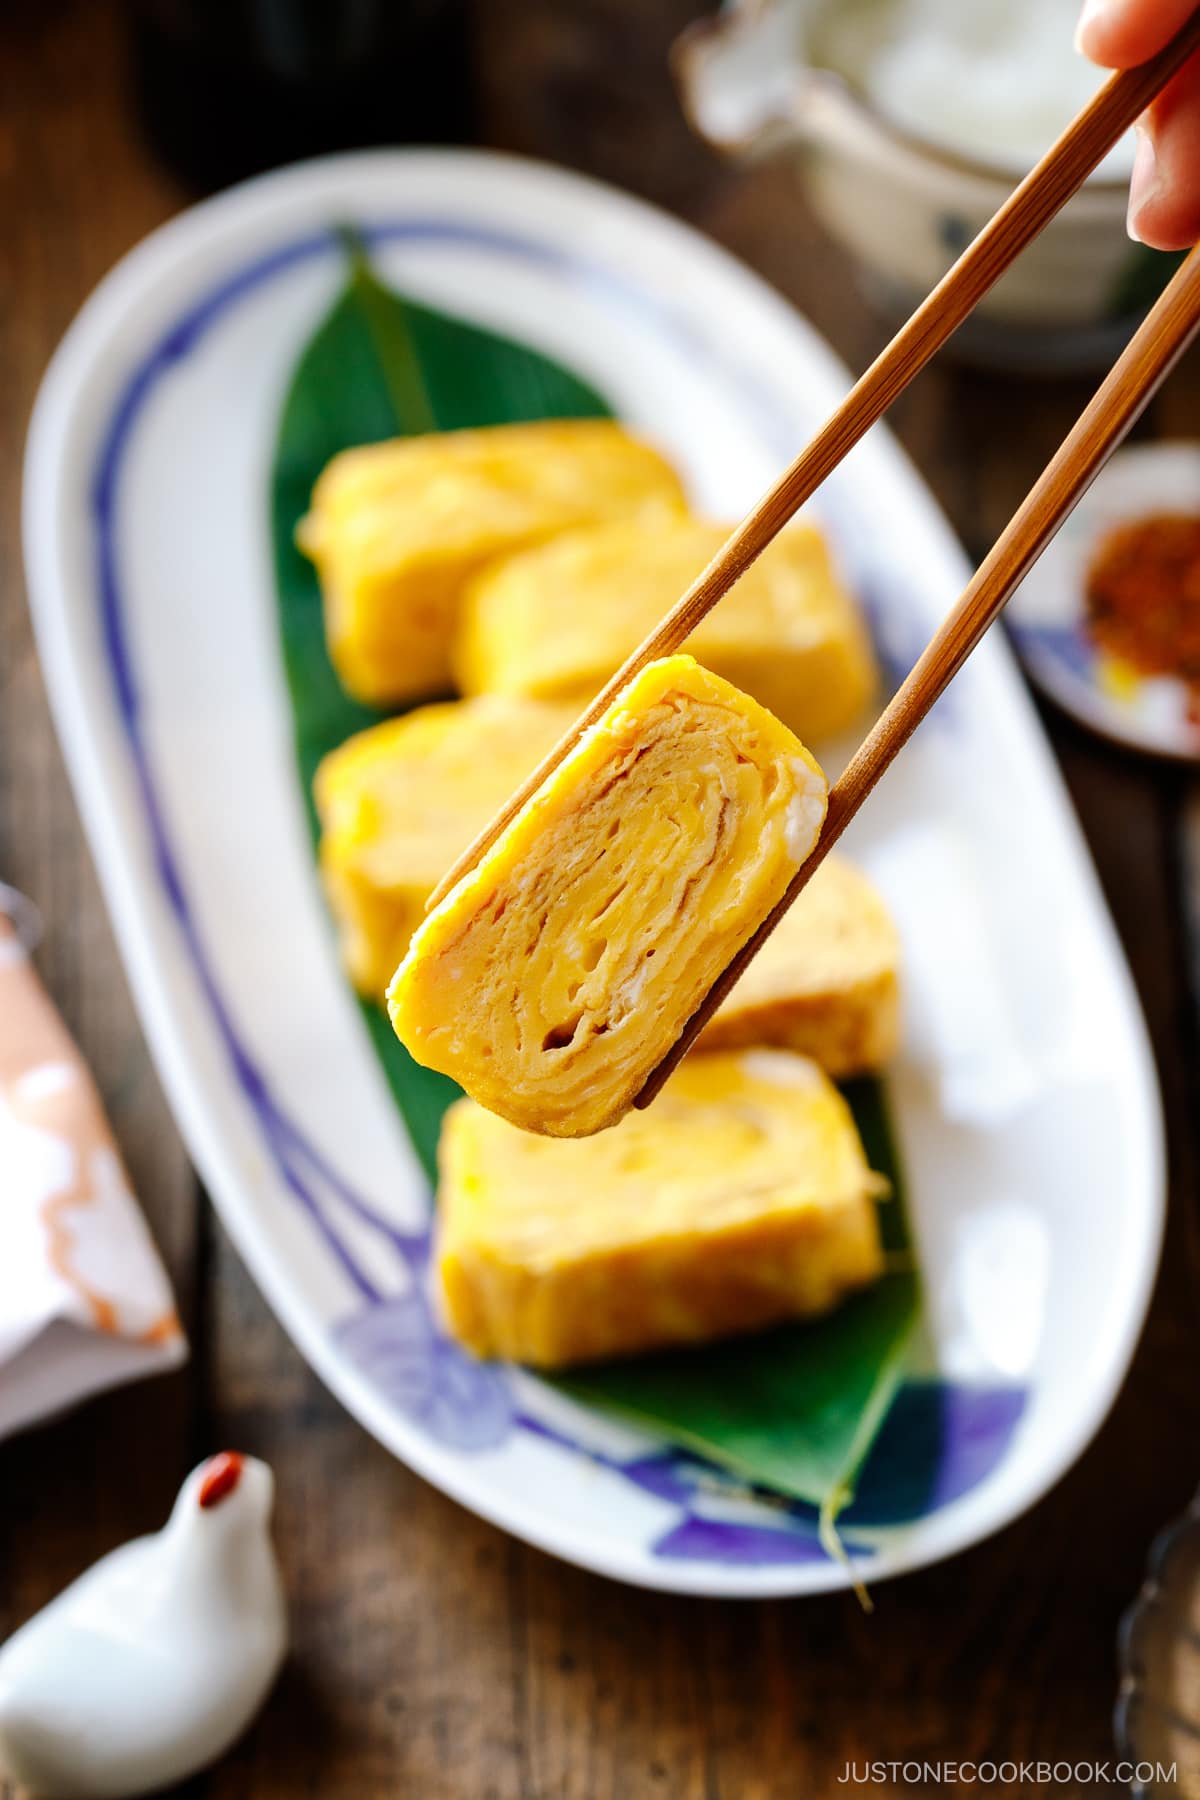
- Cut the tamagoyaki after cooling for a few minutes.
How to Enjoy Tamagoyaki
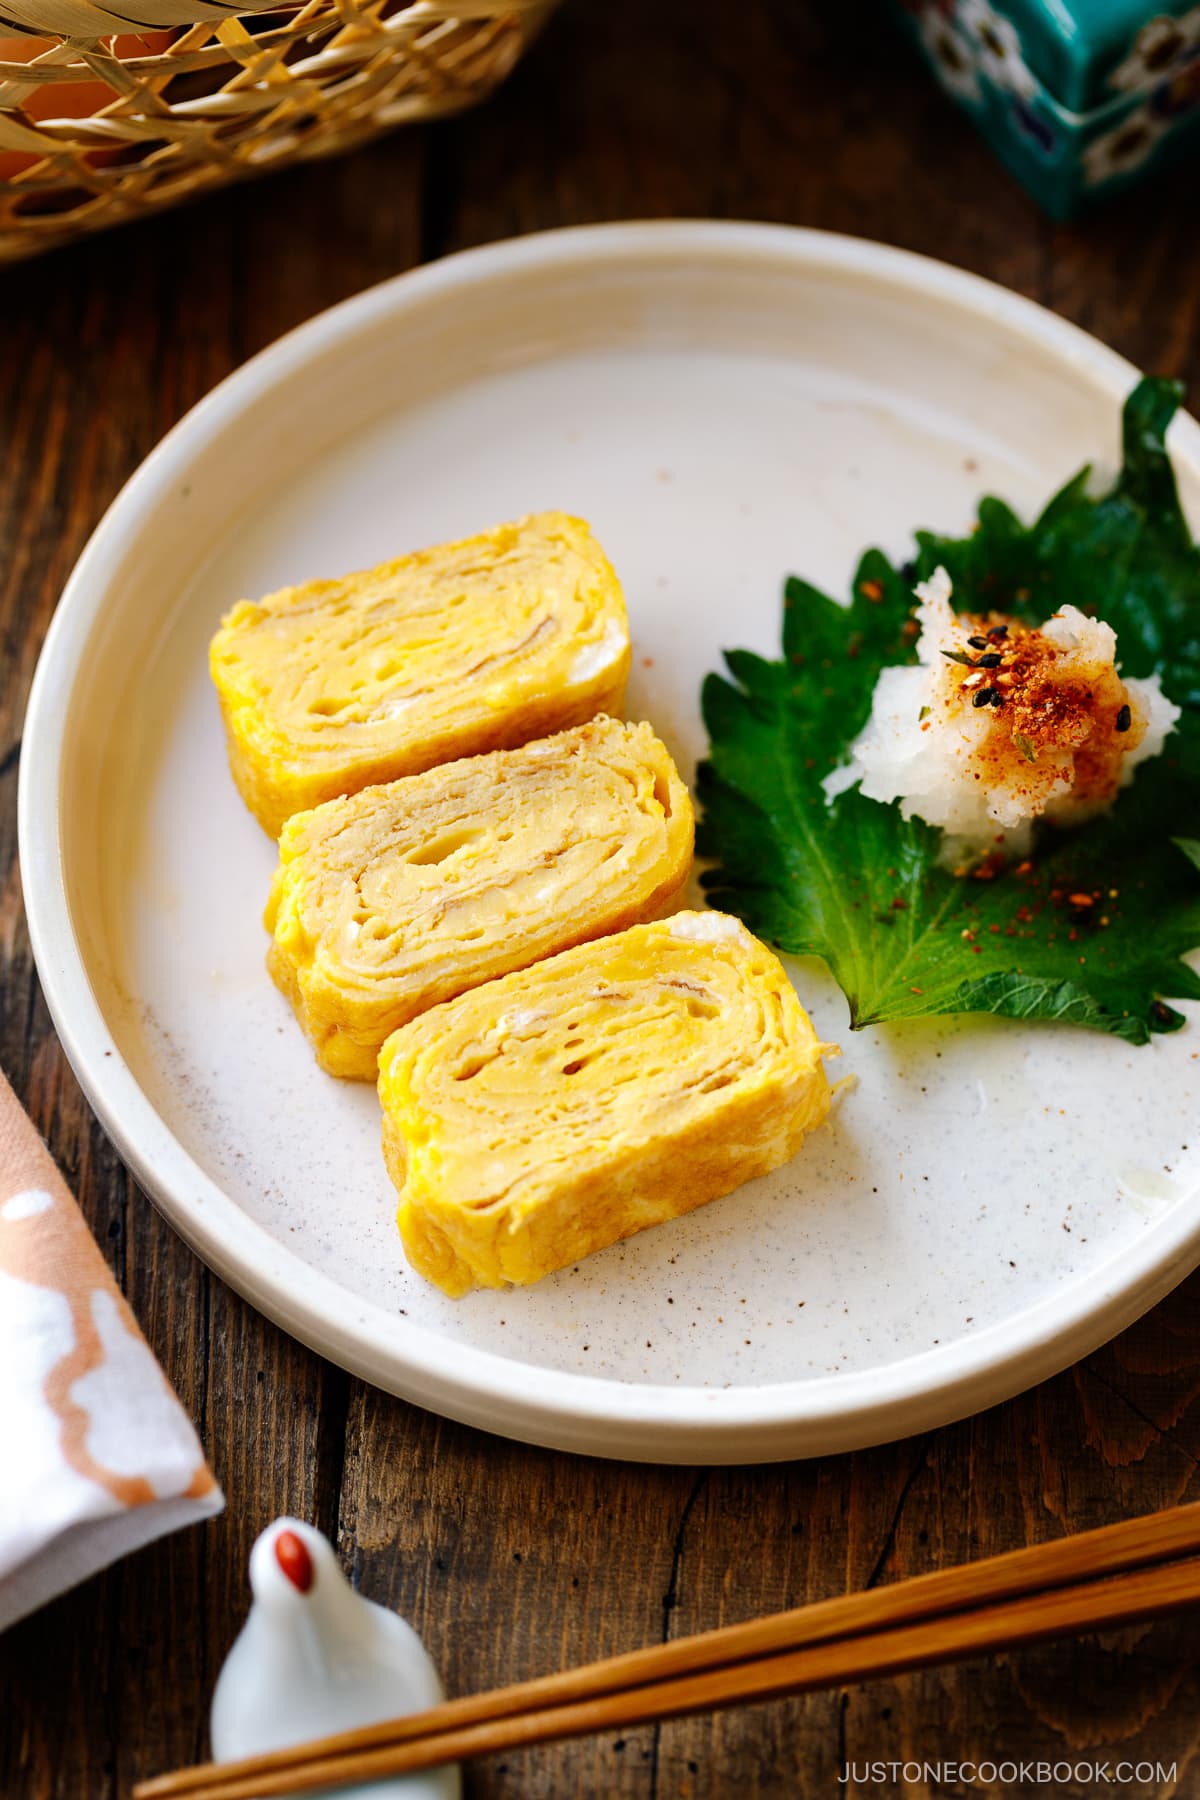
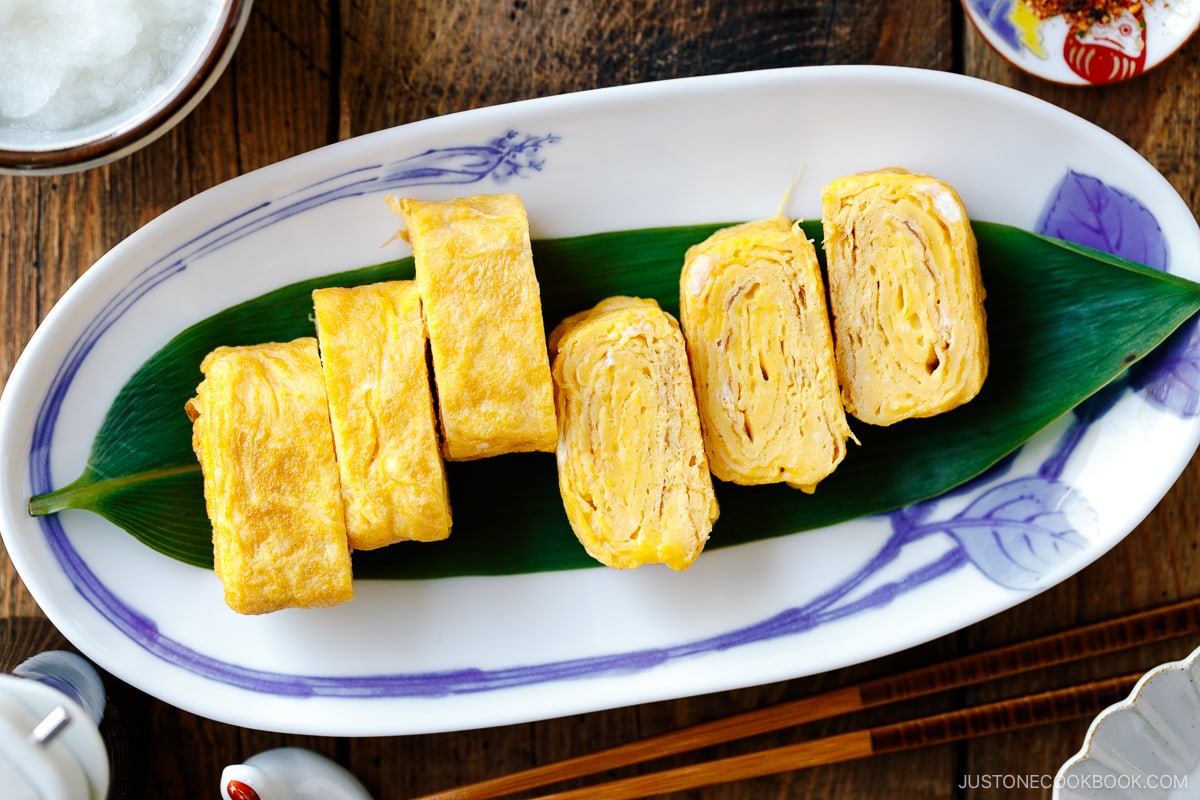
While tamagoyaki can be enjoyed on its own, it is often served with grated daikon. For added flavor, drizzle soy sauce and, if desired, sprinkle optional shichimi togarashi (Japanese 7 spice) before savoring.
How to Store and Reheat
The good thing about tamagoyaki is that it’s delicious at room temperature too! Therefore, you can make it ahead and pack in your bento lunch box. You can also freeze them, but the texture will change slightly (I don’t mind, but you might).
- To Refrigerate: Cool and store in an airtight container for up to 3 days.
- Freezing: Cool and store in an airtight container for up to a month.
- To Reheat: Thaw in the refrigerator overnight. If you’re packing in a bento lunch box, you can pack it frozen without thawing (should be thawed by lunchtime).
Best Tamagoyaki Pan
Do we need a tamagoyaki pan? A special rectangular or square pan helps create a nice log shape, but you can still make a rolled omelette without one, and I’ve shared how to do it in my recipe below.
If you’re curious about which tamagoyaki pan is the best, I’d say it depends on your skill and preference, but I’ll also share my own experience.
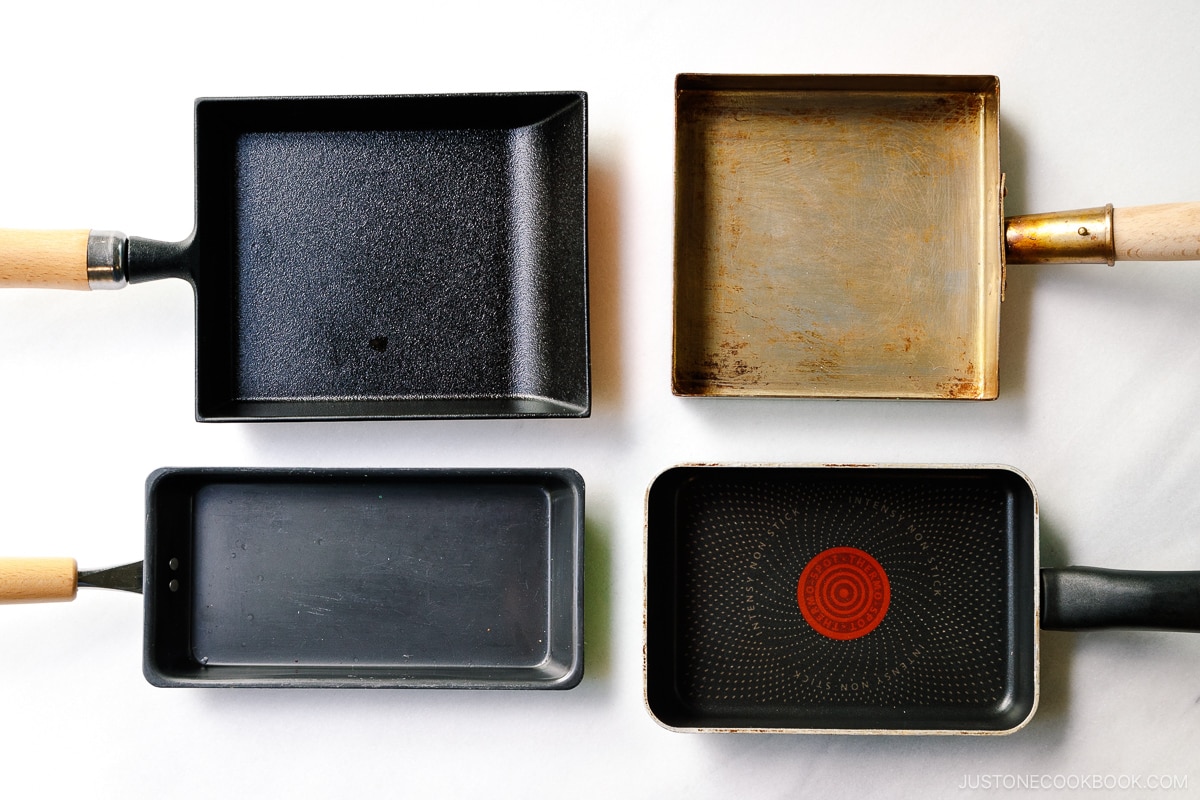
If you are making tamagoyaki multiple times a day, a traditional copper tamagoyaki pan can produce a wonderful tamagoyaki with a nice custardy texture, thanks to its excellent heat conductivity. However, it wasn’t the right choice for me, as it requires a considerable amount of oil and a lot of practice.
I initially loved using the T-fal non-stick tamagoyaki pan; it was very user-friendly. However, I discontinued its use when I decided to phase out non-stick frying pans altogether. I experimented with a small carbon steel tamagoyaki pan, but the eggs tended to stick more than I preferred.
After trying out various tamagoyaki pans, I decided to invest in another pan—a cast iron tamagoyaki pan by Iwachu, a well-known 120-year-old Nambu ironware (南部鉄器) manufacturer from Japan. I had concerns about its weight initially, but after using it for a while, I got the hang of it, and I’m happy to say I’ve finally found the one I like!
Having a good tamagoyaki pan contributes to making a nicely shaped omelette, but I can’t stress enough that practice is the most crucial factor of all. Even with a great tool, if you don’t practice well, you may still struggle to make a good omelette.
Although it’s heavier, and I can’t rely on centrifugal force to help roll the omelette, I appreciate that it’s almost non-stick. Here are some of the tamagoyaki pans I’ve used in the past.
Fun Fillings for Tamagoyaki
For a little fun and variety, consider adding the following ingredients to the mixture:
- Julienned shiso
- Chopped green onions
- Minced vegetables
- Red pickled ginger (kizami shoga)
- Corn
- Shredded cheese
You can also include the following ingredients before rolling each layer of egg mixture:
- Mentaiko
- Ham/bacon
- Imitation crab
- Blanched spinach
- Soboro chicken
- Nori seaweed (cut in half)
What to Serve with Tamagoyaki
Tamagoyaki is a nutritious and protein-packed side dish that complements any Japanese or Asian-style meal. We enjoy serving it as part of the ichiju sansai-style meal.
Wish to learn more about Japanese cooking? Sign up for our free newsletter to receive cooking tips & recipe updates! And stay in touch with me on Facebook, Pinterest, YouTube, and Instagram.
3-Ingredient Simple Tamagoyaki
Learn how to make the iconic Japanese rolled omelette with my step-by-step tutorial and video. My 3-Ingredient Simple Tamagoyaki recipe requires no dashi and is ready in just 15 minutes! Enjoy this savory-sweet dish in your breakfast or bento lunch.
Prevent your screen from going dark
Instructions
-
Gather all the ingredients. In this recipe, I show you two methods—one using a cast iron tamagoyaki pan and the other using a carbon steel frying pan. Although I avoid nonstick pans, it is easier to make tamagoyaki in a nonstick pan, if you‘d like to use one. Read more about tamagoyaki pans in the blog post.
To Prepare the Egg Mixture
-
To a measuring cup or bowl with a pouring spout (I love this HARIO bowl), add 3 large eggs (50 g each w/o shell) and ½ Tbsp sugar. I like to add 1 pinch salt as well. Then, add 1 tsp usukuchi (light-colored) soy sauce and 1 Tbsp water.
-
Gently “cut“ the eggs using cooking chopsticks in a zigzag motion and with the chopstick tips touching the bottom of the mixing bowl. Do not overmix or incorporate air into the eggs. For a refined texture and even coloring, you can pass the egg mixture twice through a fine-mesh sieve (optional).
To Cook in a Tamagoyaki Pan (Method 1)
-
Cook the first layer. Heat the tamagoyaki pan over medium heat. Dip a silicone brush or folded paper towel in some neutral oil and apply a thin layer to the pan. To check if the oil is hot enough, use the “sizzle“ test: Put a drop of the egg mixture in the pan; when you hear a sizzling sound, the pan is ready.
-
Pour in a thin layer of egg mixture. Quickly tilt the pan to coat the entire cooking surface with egg. Add just enough to fill the pan and don‘t overpour. For my pan size, I had enough to cook 4 thin layers of egg mixture; you may have more or fewer layers, depending on your pan size.
-
Pop any air bubbles (I use cooking chopsticks). Tilt the pan again to distribute the egg mixture evenly.
-
Once the bottom of the egg has set and the top is soft but no longer runny, start rolling the egg into a log shape with a spatula (or cooking chopsticks). Start from the far side of the pan and roll toward the pan handle. Don‘t worry about making a perfect roll at this stage.
-
Lightly grease the far side of the pan. Then, push the omelette back to the far side.
-
Cook the second layer. Lightly grease the front side of the pan. Use the sizzle test to see if the oil is hot enough. When the pan is ready, pour a second thin layer of the egg mixture to just cover the entire cooking surface.
-
Lift the omelette so the runny egg mixture goes underneath it. Pop the air bubbles and tilt the pan again to distribute the egg mixture evenly.
-
As soon as the new layer of egg is set on the bottom and still soft on top, continue rolling the omelette from one side to the other into a log shape. Use a spatula if needed. Tip: Control the temperature by lifting the frying pan rather than adjusting the stove heat. If the heat is too weak, the egg will stick to the frying pan, so be careful.
-
Once again, lightly grease the far side of the pan, push the omelette to the far side, and grease the front side.
-
Cook the third layer. Check that the oil is hot enough. When the pan is ready, pour the third portion of egg. Lift the omelette so the runny egg goes underneath it.
-
When the egg is set on the bottom and soft on top, roll the omelette.
-
Grease the far side of the pan, move the roll to the far side, and grease the front side.
-
Cook the final layer. Check that the pan is hot enough, then pour the final thin layer of egg mixture. Lift the omelette so the runny egg goes underneath it.
-
When the egg is no longer runny, roll the omelette.
-
Once you‘re finished rolling, press down on the omelette to flatten. Push it against the sides of the pan to shape it into a nice rectangular block. You can brown the omelette a bit, to your preference.
-
Transfer the Tamagoyaki to a cutting board. To help set its shape, wrap the Tamagoyaki with a bamboo sushi mat (optional) while it’s still hot. Let it stand for 5 minutes (optional) to allow the residual heat to finish cooking the egg and to cool slightly.
To Cook in a Round Frying Pan (Method 2)
-
Cook the first layer. Heat a round medium frying pan (I use this 10¼” carbon steel pan) over medium heat. Dip a silicone brush or folded paper towel in neutral oil and apply a thin layer to the pan. Wait until the oil gets hot enough. To check, use the “sizzle“ test: Put a drop of the egg mixture in the pan; if you hear a sizzling sound, the pan is ready.
-
Pour in a thin layer of egg mixture. Quickly tilt the pan to coat the entire cooking surface with egg. Add just enough to fill the pan and don‘t overpour. For my pan size, I had enough to cook 3 thin layers of egg mixture; you may have more or fewer layers, depending on your pan size. Next, pop any air bubbles (I use cooking chopsticks). Tilt the pan again to distribute the egg mixture evenly.
-
When the bottom of the egg has set but the top is still soft, use a spatula to fold over the left and right sides toward the center to make a rectangular shape. Then, roll the egg into a log shape. I started from the pan handle side and rolled toward the far side of the pan. Don‘t worry about making a perfect roll at this stage.
-
Cook the second layer. Leave the rolled omelette on the far side. Lightly grease the pan, including underneath the omelette. Use the sizzle test to check if the oil is hot enough. When the pan is ready, pour a second thin layer of the egg mixture to cover the entire cooking surface. Lift the omelette so the egg mixture goes underneath it.
-
Pop the air bubbles and tilt the pan again to distribute the egg mixture evenly. When the bottom of the egg has set but the top is still soft, fold the sides toward the center to the same width as the omelette. Roll the omelette into a log shape.
-
Lightly grease the pan again and use the sizzle test to check if the oil is hot enough.
-
Cook the final layer. When the pan is ready, pour a final thin layer of the egg mixture to cover the entire cooking surface. Lift the omelette so the egg mixture goes underneath it. When the egg is no longer runny, fold the sides toward the center and roll the omelette into a log shape.
-
Press down on the Tamagoyaki to flatten. You can brown the omelette a bit, if you‘d like. Remove from the pan onto the cutting board. To help set its shape, wrap the Tamagoyaki with a bamboo sushi mat (optional) while it’s still hot. Let it stand for 5 minutes (optional) to allow the residual heat to finish cooking the egg and to cool slightly. To serve, cut the Tamagoyaki in half crosswise, then cut each half into thirds. Enjoy!